 E0102-VR
A brief tutorial for E0102-VR
Although some efforts were invested into making the use of E0102-VR as straightforward as possible, this application remains experimental. This tutorial should help guide the users through some of the less intuitive aspects of the different interactions modes.
You can read this now, or dive head first in the app and come back later if something doesn't make sense.
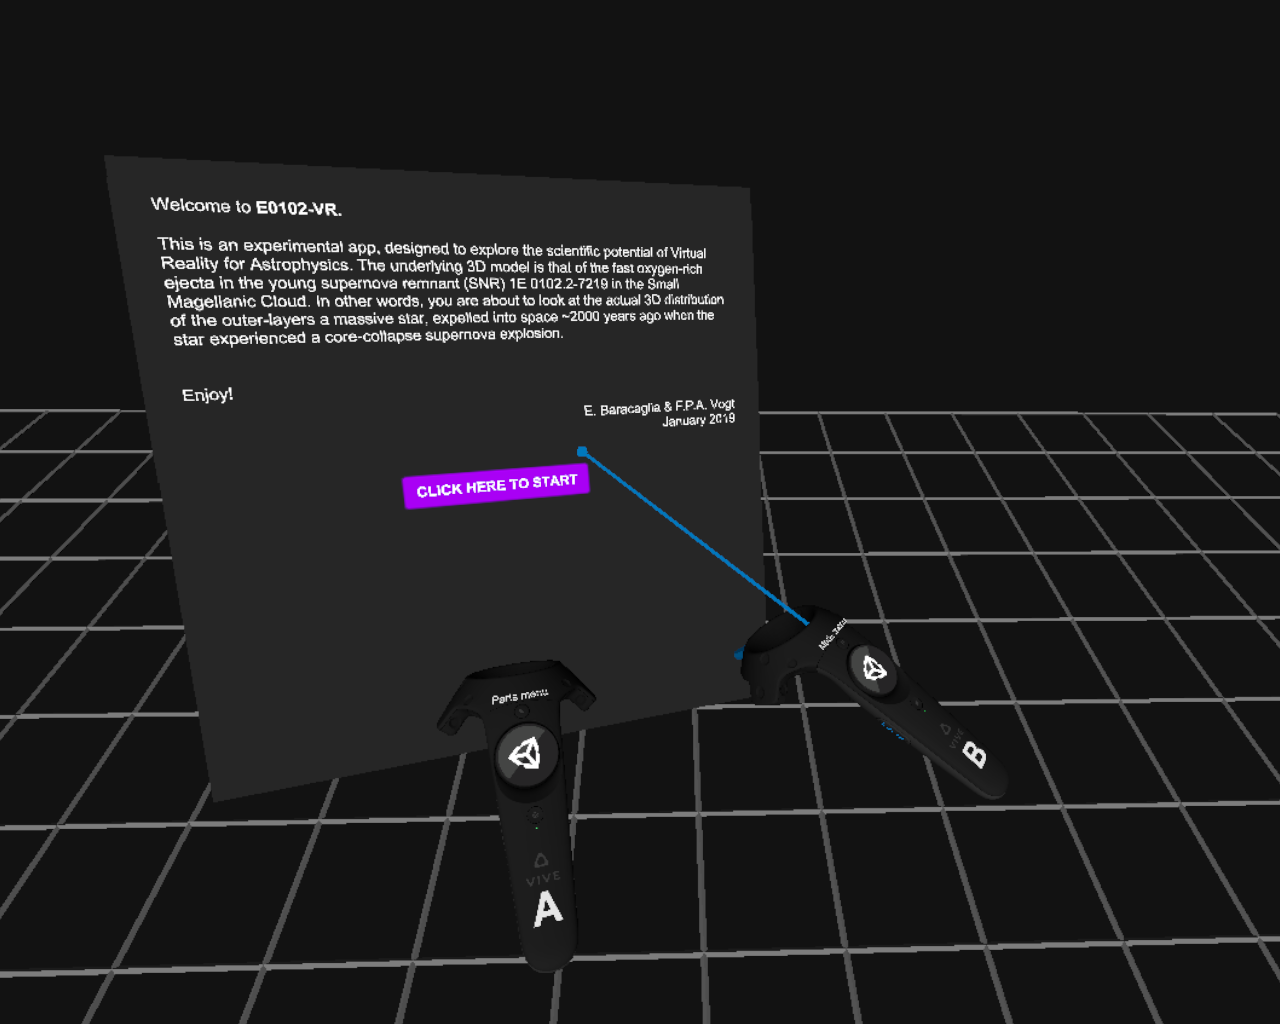
First thing first: load the model
Upon launching E0102-VR, you must enable the 3D model. To do so, point the laser beam
to the purple button that reads "Click here to start", and pull the trigger of
the handle "B". If you do anything else before this, you are on your own ...
Click vs touch
There are different buttons throughout E0102-VR. These can all be "clicked" by a)
pointing the laser beam towards them, and b) pulling the trigger on the controller
B.
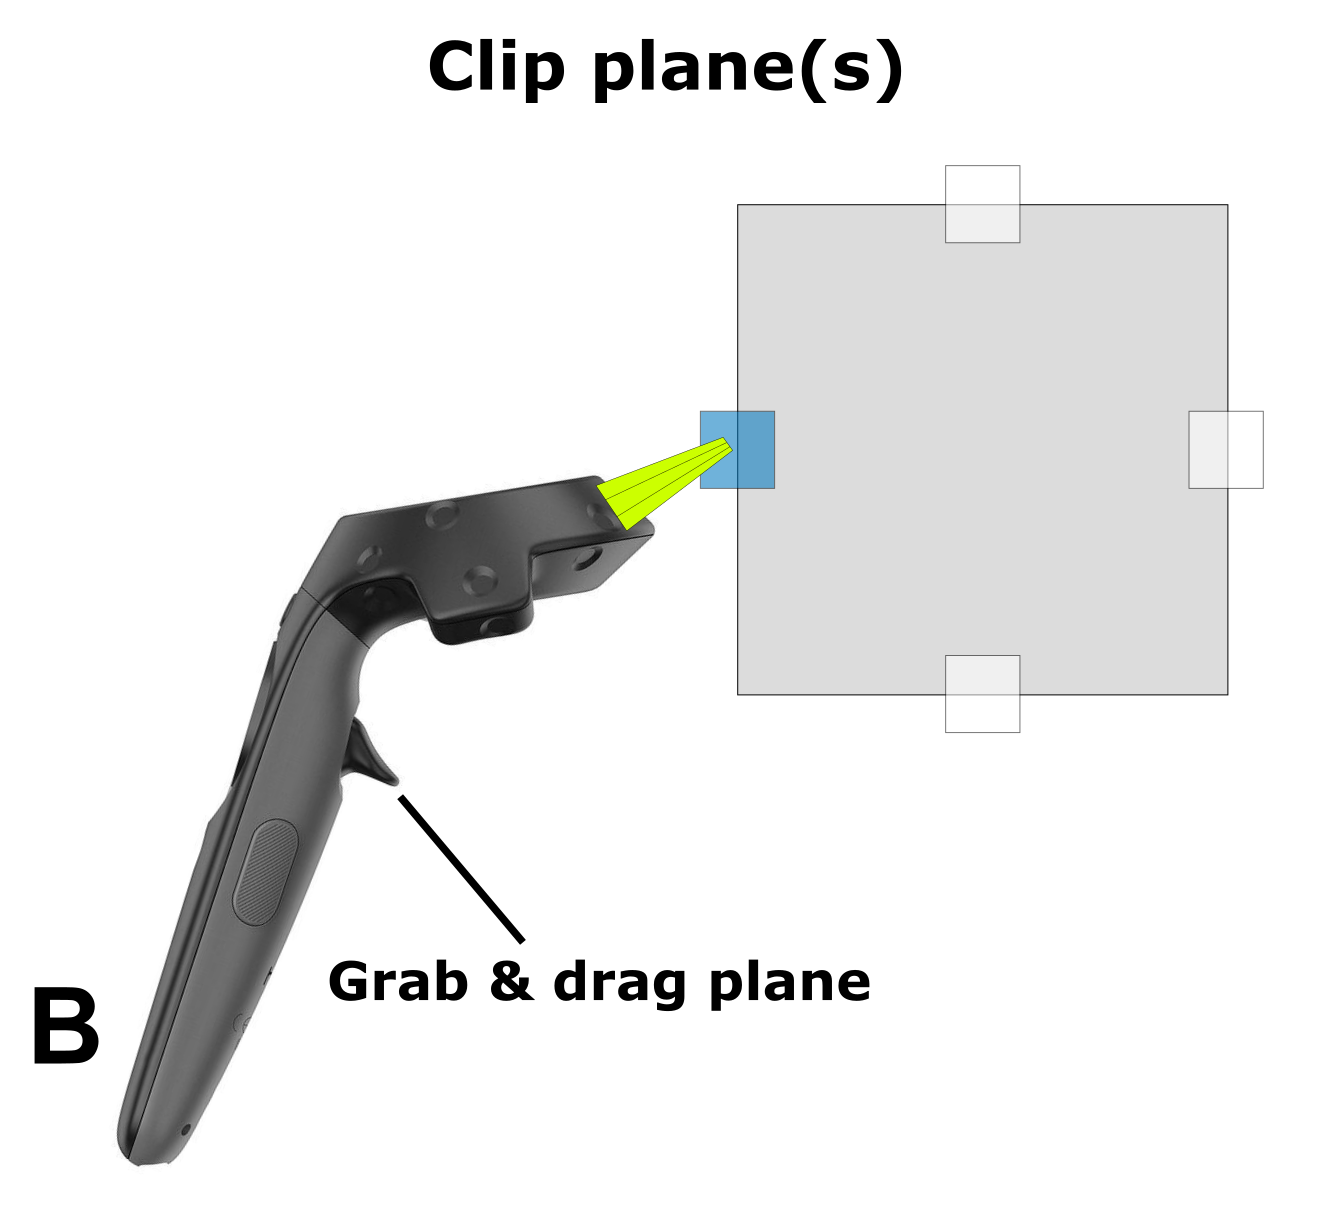
The model parts and some other elements inside the app can be grabbed and dragged.
To do so, the targeted part must a) be touched with the yellow pointer attached to
controller B, and b) dragged as required by pulling the trigger on the same controller.
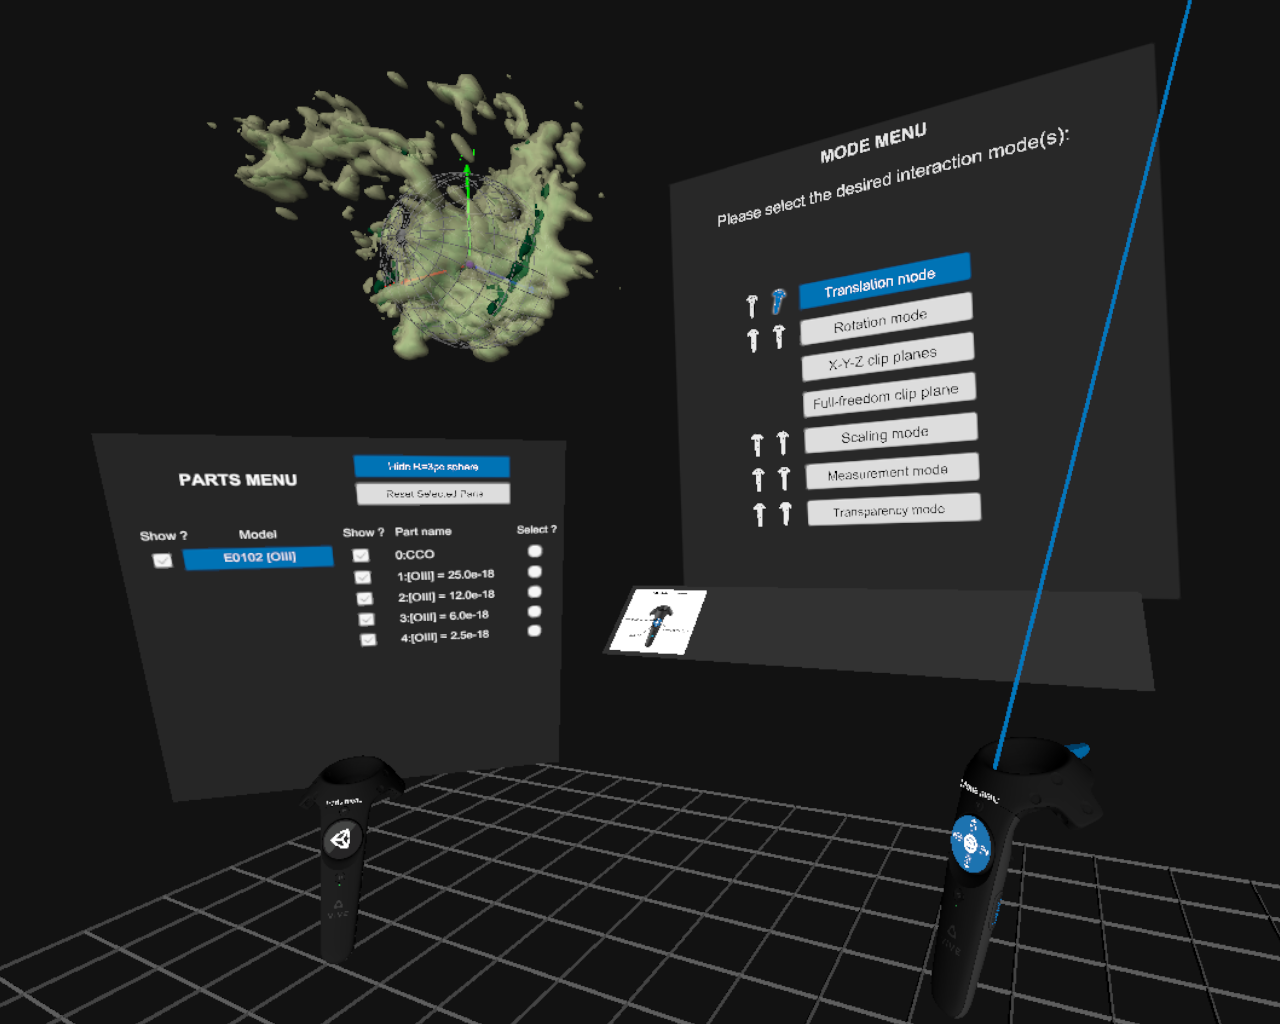
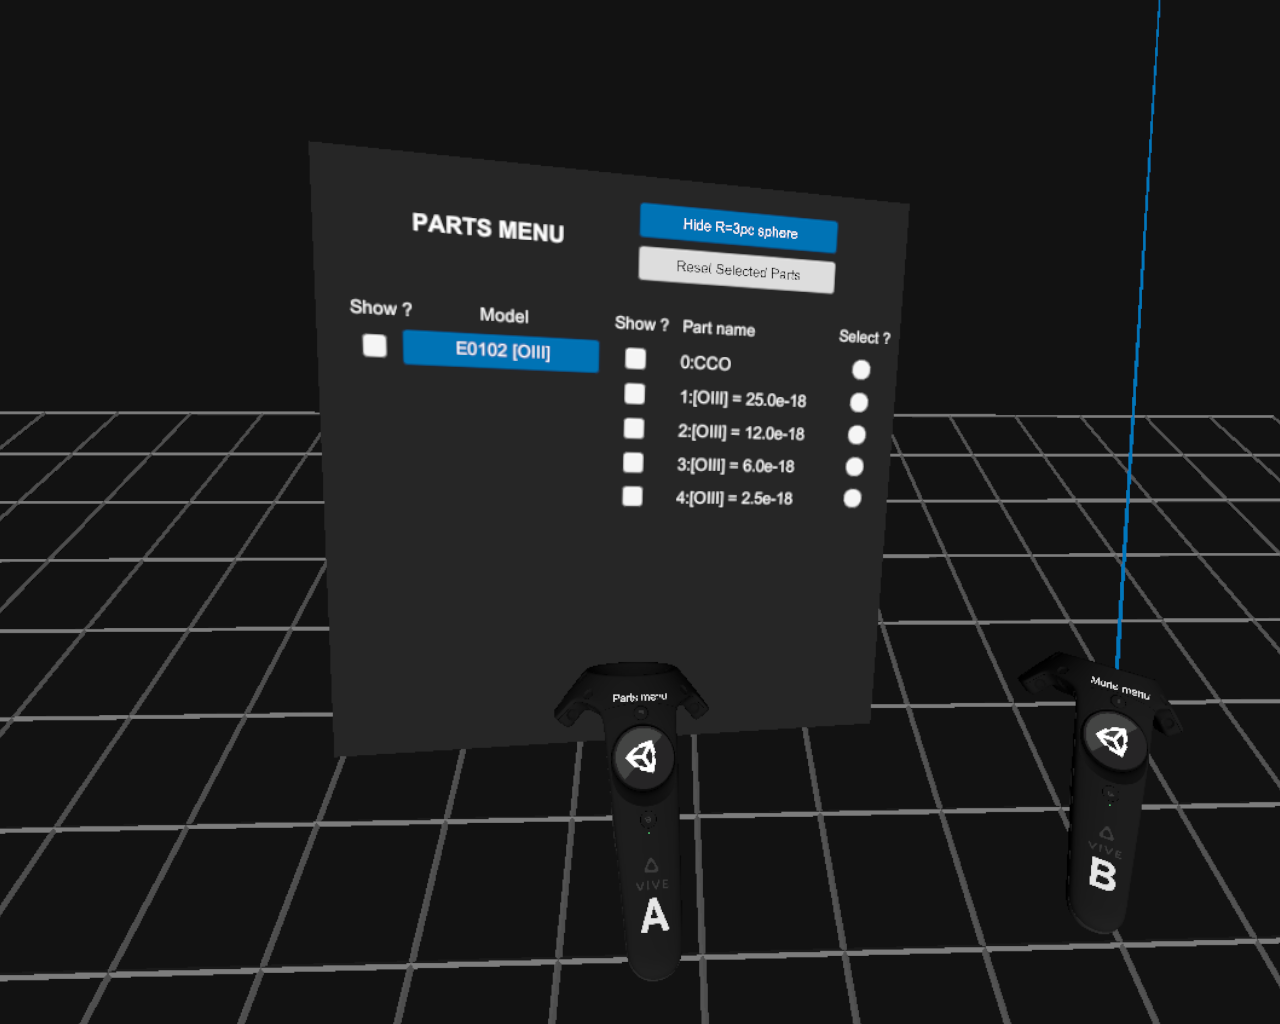
The "parts menu"
Once the model has loaded, the "parts menu", attached to the controller A,
lists the 5 different subparts of the model: 4 iso-contours of distinct oxygen-emission
line intensities, and the Central Compact Object. The user can show/hide this menu
by pushing the button labelled "parts menu" on the front of controller A.
From this menu (using the laser beam and trigger button from the controller B),
each model part can be shown or hidden using the ticks under the "Show?" columns.
By touching model parts with the yellow pointer attached to the controller B,
the user can drag individual model parts around. To place them back in their
original position, the part must first be selected (by clicking the appropriate
white disk in the "Select?" column of the parts menu) prior to clicking the
"Reset selected parts" button.
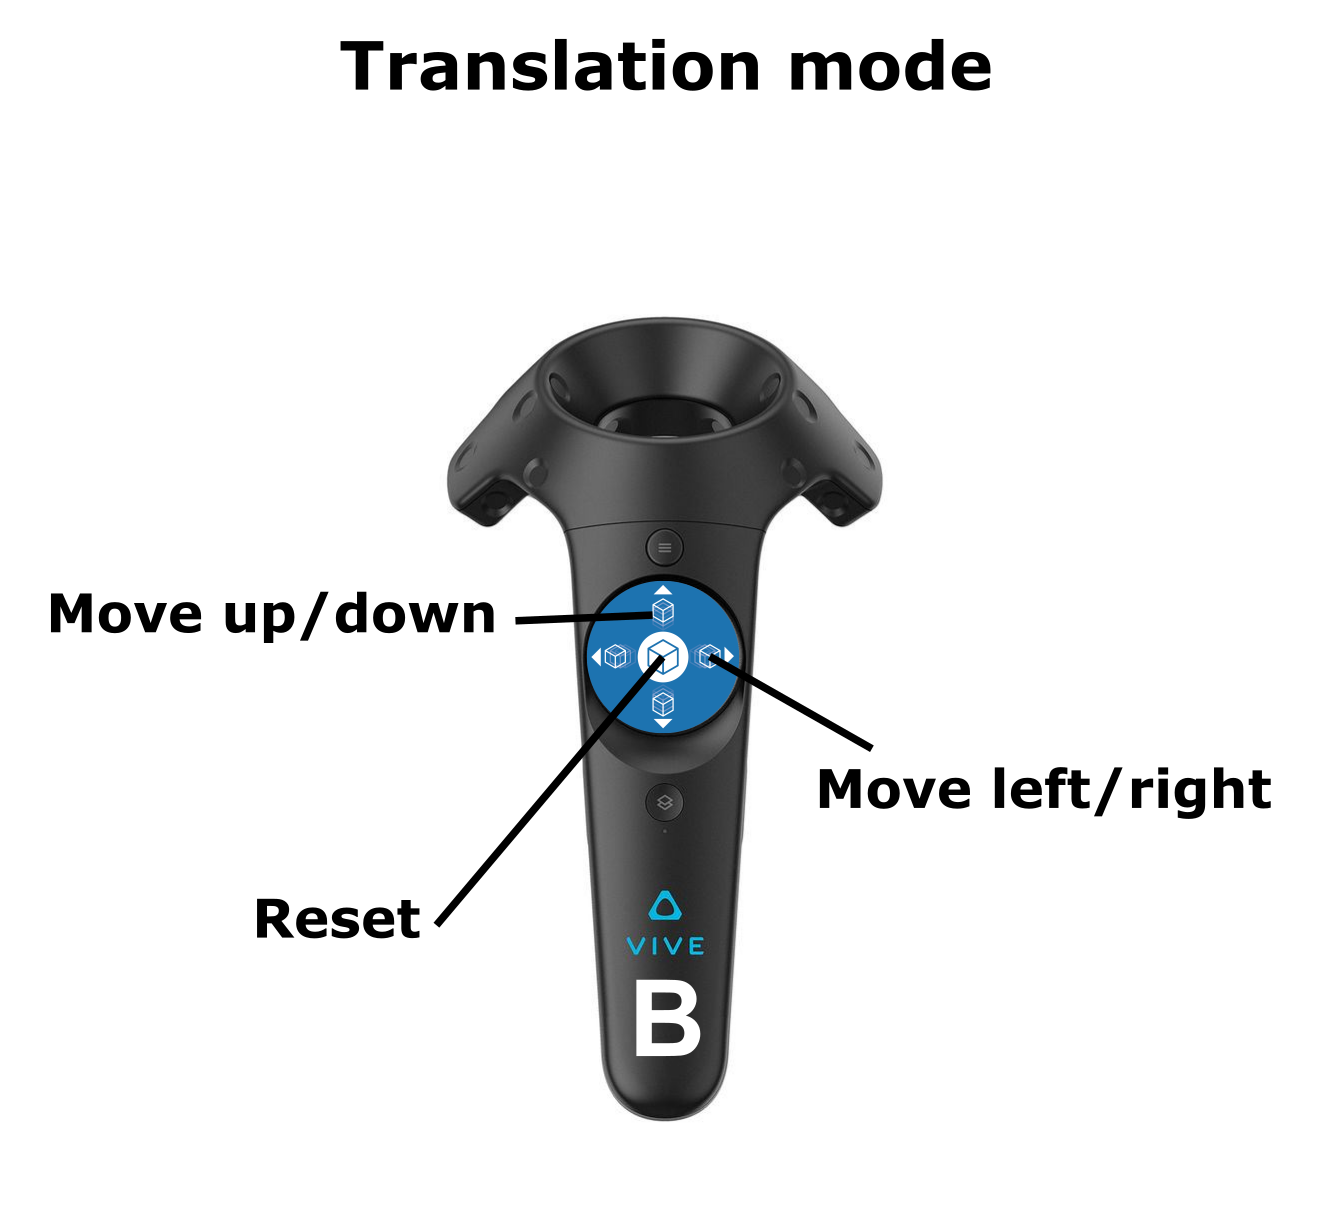
The "mode menu"
The users can select different interaction modes from the "mode menu", which is
visible on one of the wall of the interaction area. The user can show/hide this
menu by pushing the button labelled "mode menu" on the front of controller B.
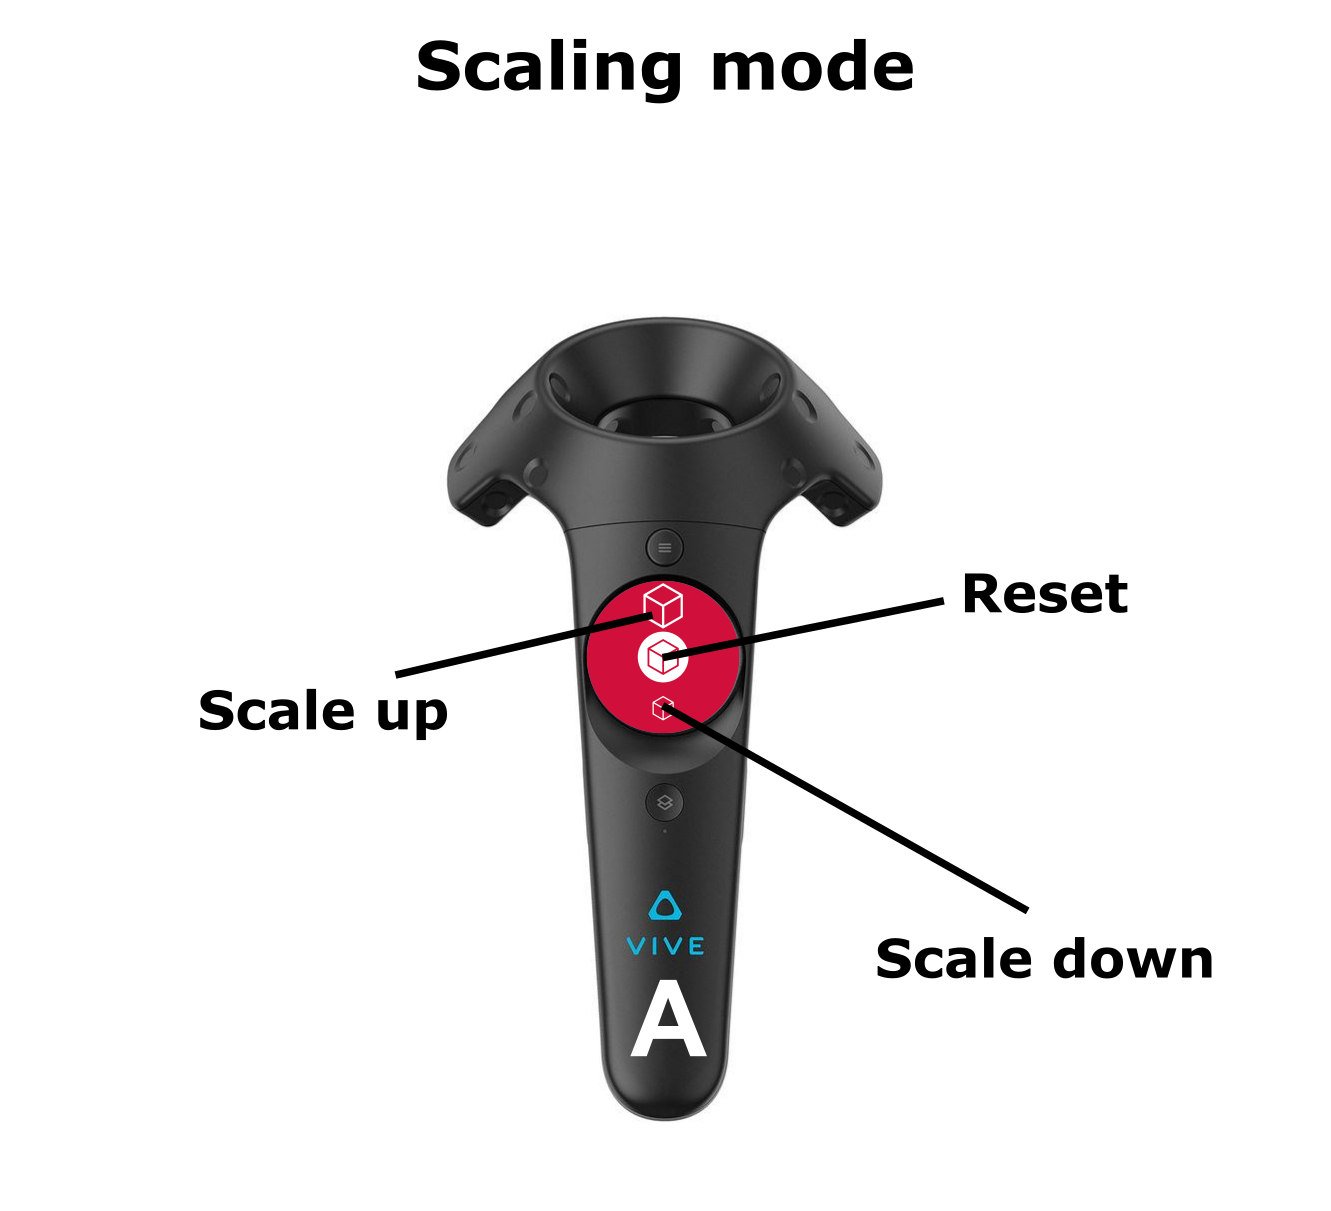
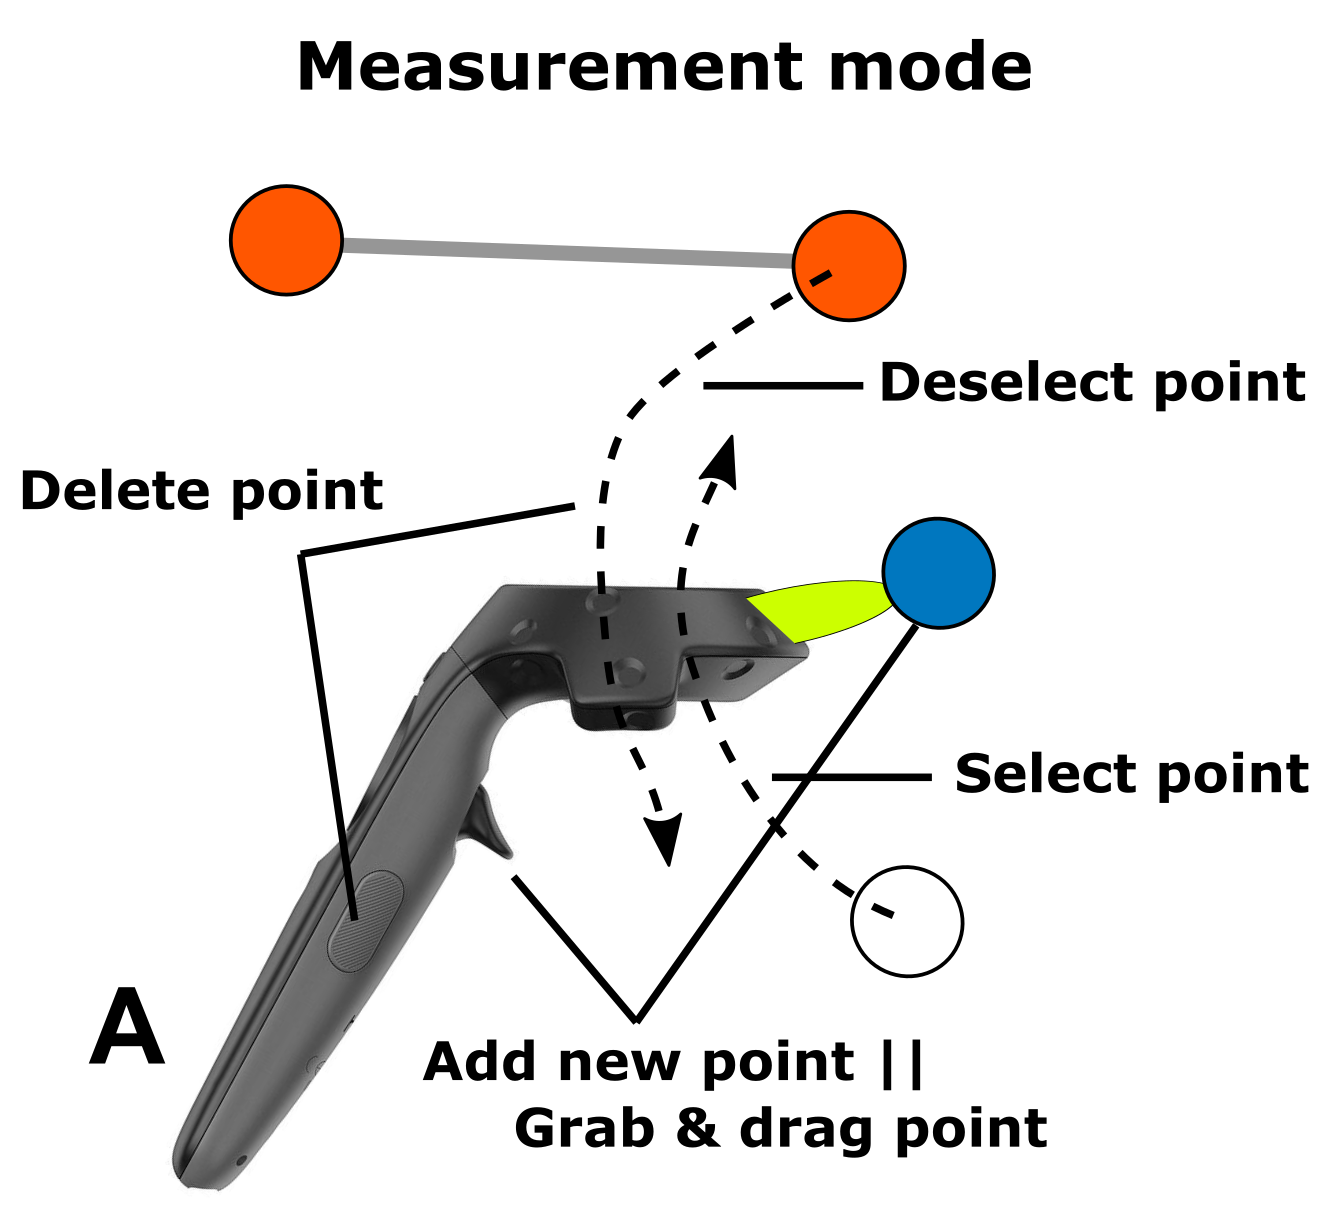
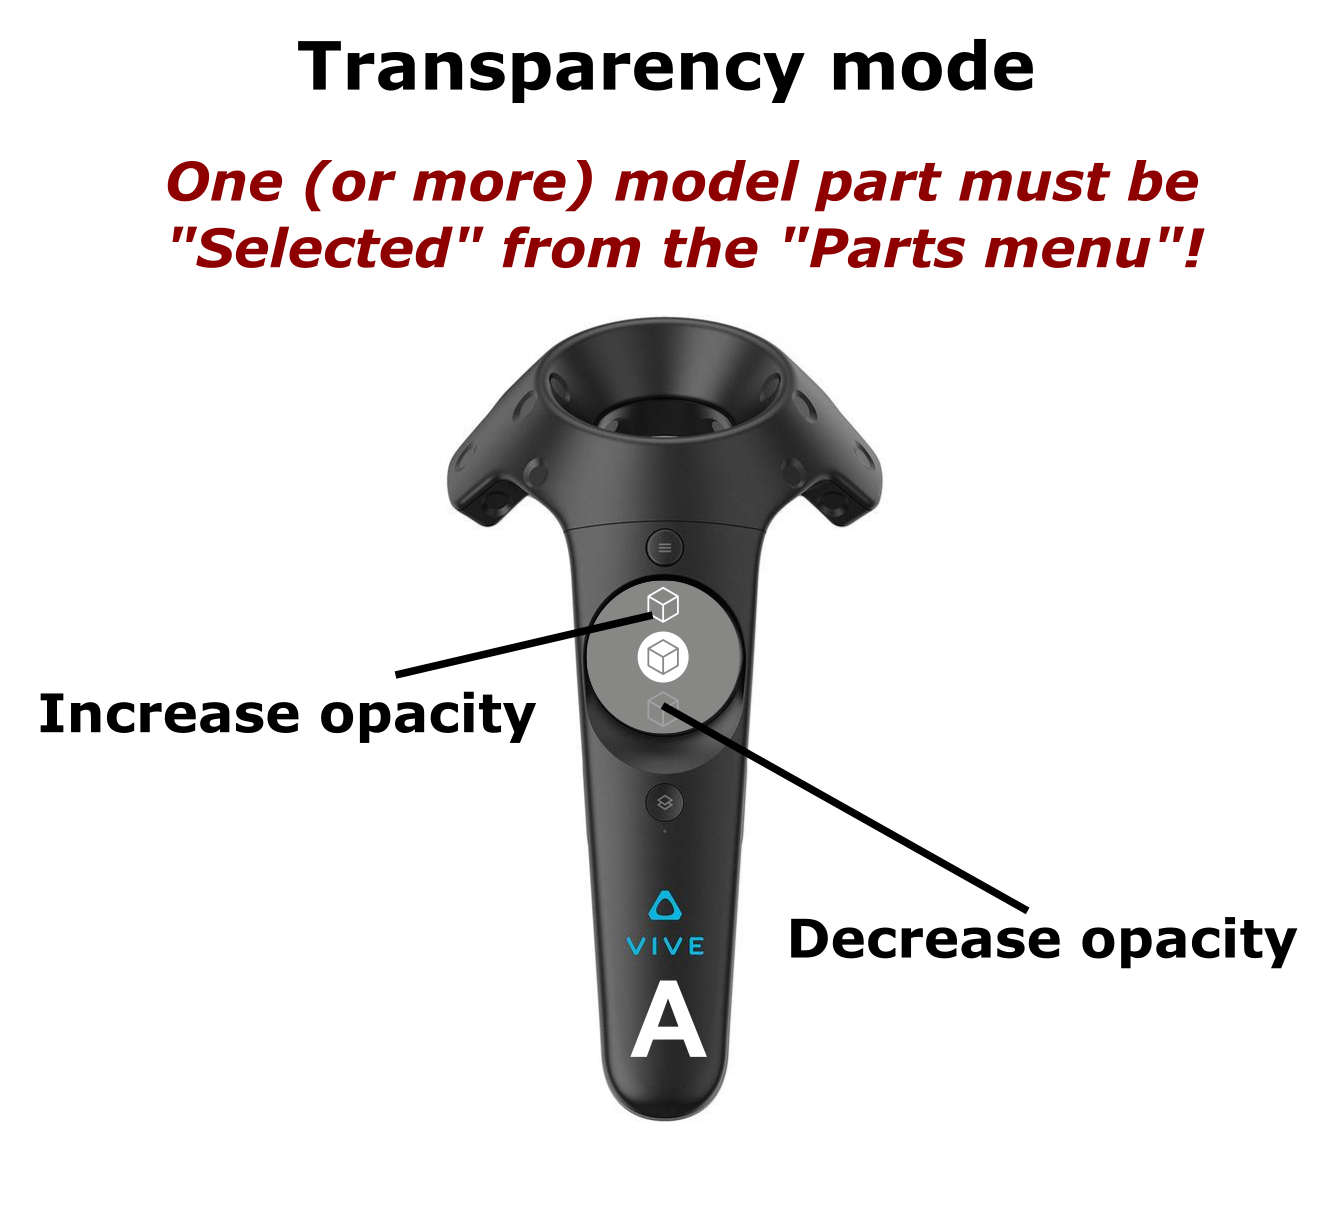
Selecting one (or more) mode will enable specific buttons on either the controller
A or B. Detailed instruction panels (shown below) detailing the buttons (and actions)
associated with the interaction modes enabled by the user are displayed at the base of the
mode menu.

And that's it!
If something still doesn't make sense, feel free to get
in touch with us.
And remember, the entire code of E0102-VR is free and easily accessible
if you want to take a closer look! We're pretty certain that you'll be horrified if you do so :-)